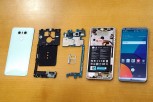
Dedicated teardown and disassembly outlets like iFixit won't have much work to do on the G6, other than the odd repair guide - LG took its latest smartphone apart right in front of us. Hint: it's good to start by removing the SIM card tray.
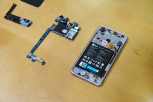
Popping off the Gorilla Glass 5 back panel reveals a rather massive fingerprint reader assembly complete with controller, all mounted to the cover. On the phone we see the wireless charging coil, but as you've probably already found out, that's only going to be present on the US versions of the G6. Sad.
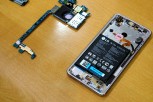
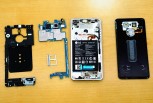
Screwdriver at the ready! Removing a handful of screws allows you to detach the bottom antenna assembly, together with the loudspeaker. The wireless charging coil comes off at once with the top antenna uncovering the back of the mainboard and the battery - still no heat pipe though.
LG G6 disassembly
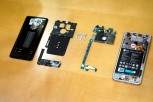
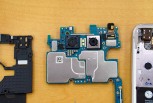
A few connectors need to be unclipped for the mainboard to come off and here's the Advanced heat pipe with the copper plate in the middle above the battery. It's meant to cool down the Snapdragon 821 and LG's internal testing has shown it to bring a 10% reduction in temperature under sustained gaming load. Inside the heat pipe there's a grand total of 0.1g of coolant - what did you expect?

LG G6 disassembly
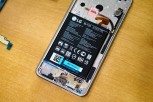
At this point you could also remove the battery, but you will need to wait for iFixit for insight on that - our LG engineer didn't go any further.
0 comments:
Post a Comment